Welcome to the Ditto Setup guide!
Before you begin effortlessly screen mirroring, displaying digital signage and sending on-screen alerts with Ditto, there are a few things you need to do. Follow the steps in this guide to learn how to set up Ditto.
Steps 1-4 are required to use Ditto screen mirroring and/or digital signage.
Table of Contents
Step 1: Make sure you have a Ditto receiver
Step 2: Set up your Ditto receiver in the Ditto Account Portal
Step 3: Create a room in your Ditto Account Portal
Step 4: Link your room and receiver
Step 5: (screen mirroring only) Deploy the Ditto Connect app to your users
Step 6: (digital signage only) Create a List
Step 1: Make sure you have a Ditto receiver
Ditto receivers are the destination for the content you wirelessly mirror and stream. They also display your digital signage and alerts. These receivers are connected to your TVs, projectors, interactive whiteboards or other display devices. It is essential to have a compatible Ditto receiver in order to use Ditto.
You can use the following devices as a Ditto receiver:
- Apple TV 4K
- Apple TV HD
- Windows device
View the receiver feature comparison chart on this page.
Make sure your receiver is plugged in and connected to your network. Move on to step 2 once you have one of these devices.
Step 2: Set up your Ditto receiver in the Ditto Account Portal
Download Ditto receiver software on the device. Then pair the receiver to your Ditto Account Portal. That’s how Ditto knows the receiver exists. Follow the directions below to complete the receiver setup process.
Option 1: Manually deploy
Follow these directions:
Option 2: Zero-touch deploy
You can zero-touch deploy Ditto receivers in bulk across your organization using an MDM system. Follow the directions in the Deployment section of the Ditto Account Portal. You should only choose this option if you are comfortable using an MDM system. Otherwise, choose to manually deploy a receiver to get started.
Note:
You can skip ahead to step 5 of this guide if you choose to “auto-link receivers to rooms” during the zero-touch deployment process.
Move on to step 3 once you’ve added a receiver to your Ditto account.
Step 3: Create a room in your Ditto Account Portal
Now that you set up a Ditto receiver, you need to link that receiver to a Ditto room in the Ditto Account Portal. Ditto rooms are simply the spaces your receivers are located, such as conference rooms, classrooms, common areas and more. A Ditto receiver is not active until it is linked to a room. Follow these directions to set up a room:
Step 4: Link your room and receiver
Once you’ve set up a room, simply link a receiver to that room. Remember, this is what makes your receiver active. To link a room and receiver:
- Go to the Ditto Account Portal
- Go to the Rooms section
- Click the "Add Receiver" button on a room
- Select the receiver you would like to assign to that room
- Click the "Confirm" button
Note:
If your Ditto trial has expired, or if you have purchased Ditto but have no available receiver subscriptions to use, you will not be able to link rooms and receivers.
Congrats!
You now have a fully deployed, active Ditto receiver that’s ready for screen mirroring, digital signage and alerts.
Step 5 (screen mirroring only): Deploy the Ditto Connect app to your users
This step is only required for screen mirroring.
Now that you have deployed a Ditto receiver, you need a way for people to wirelessly share to that receiver. This is accomplished with Ditto Connect. There are two ways to share with Ditto Connect.
- Via the Ditto Connect app. The Ditto Connect app is available on:
- macOS
- Windows
- iOS/iPadOS
- Android
- Via Ditto Connect for Web. Ditto Connect for Web allows users to initiate screen mirroring via their web browser (using the Google Chrome or Microsoft Edge browsers). It is available on:
- Chromebook (ChromeOS)
- macOS
- Windows
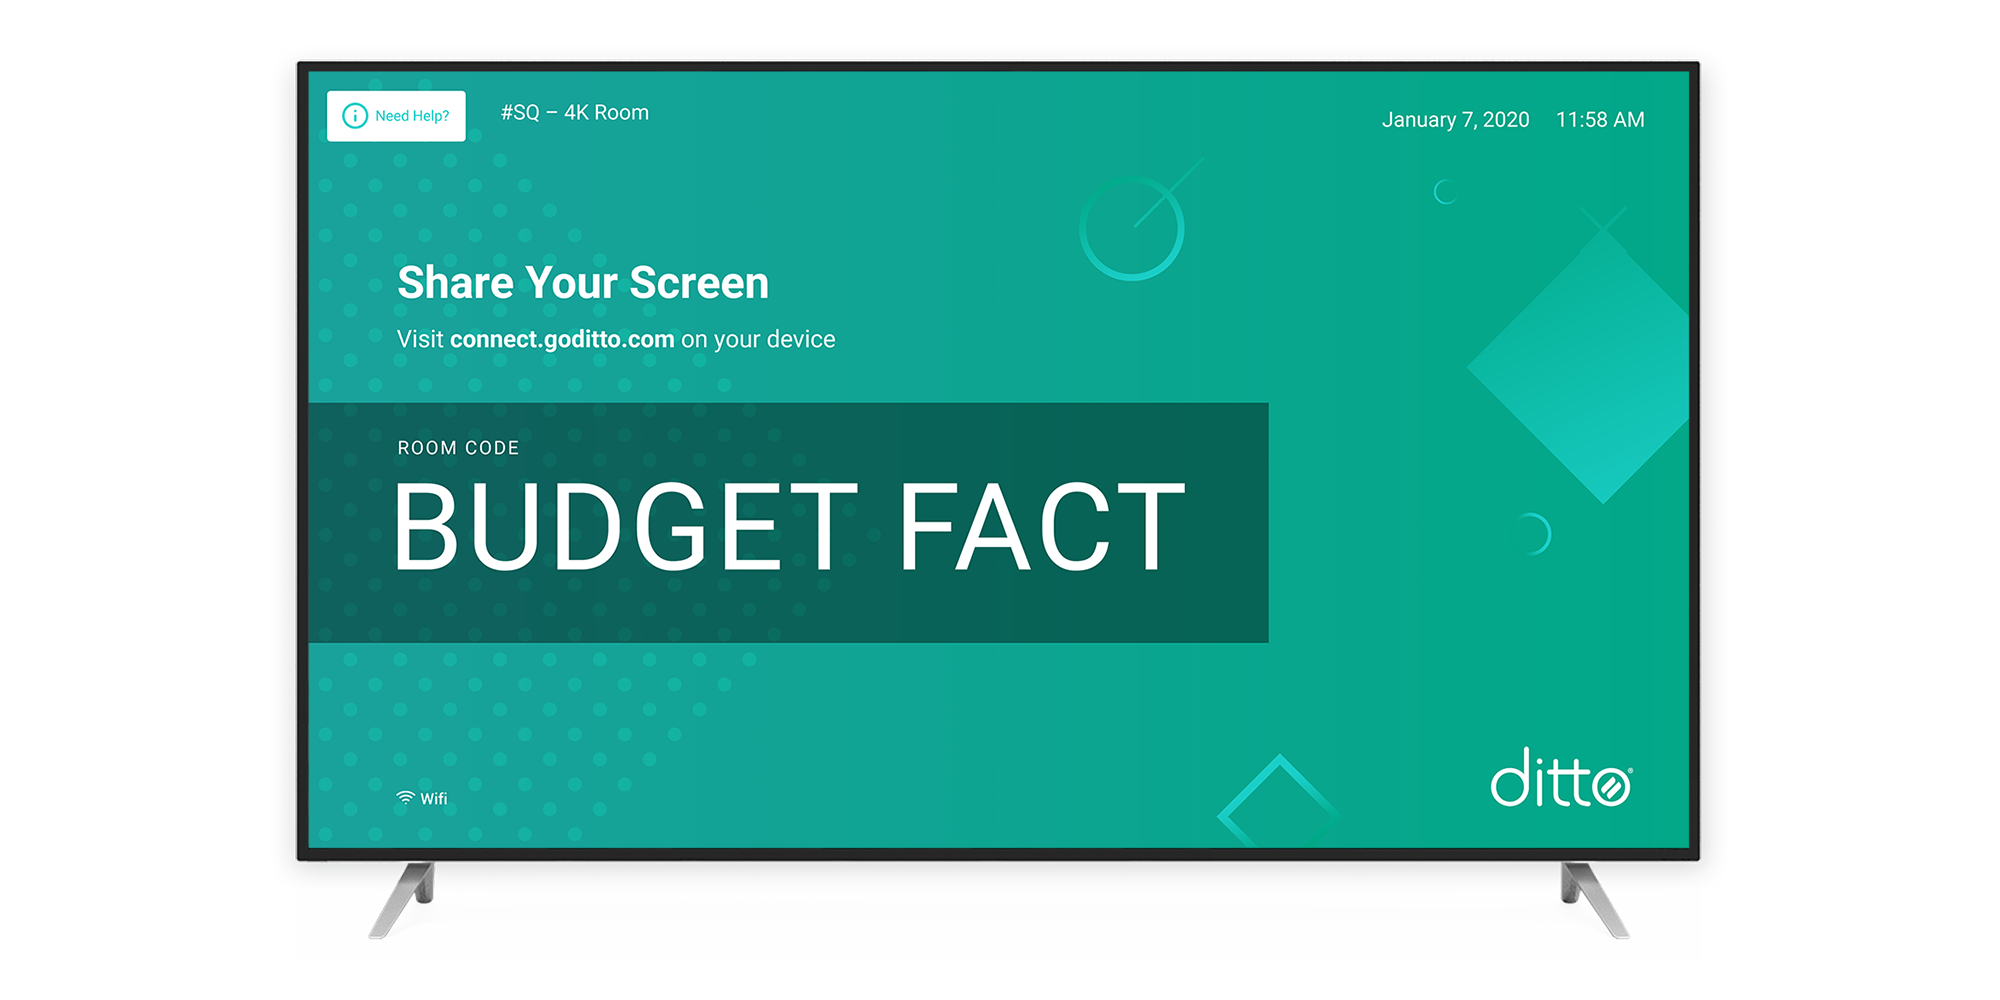
Users can visit connect.goditto.com and enter a Ditto room code to access the Ditto Connect app or share via their browser. Alternatively, users may download and install the Ditto Connect app from the Ditto download page, or IT personnel may choose to distribute the app to user devices via their preferred deployment method.
Ditto receivers display connection instructions by default (pictured below). Users must simply enter the room code into Ditto Connect to begin wirelessly sharing.
Troubleshooting Tip:
Ditto does not require network modifications for most organizations. However, if you are having trouble connecting to your receivers, a minor modification to your organization’s network may be required. Click here for details and other network setup tips to ensure Ditto works on your network.
Step 6 (digital signage only): Create a List
You're almost ready to display digital signage! To use Ditto digital signage, begin by creating a signage list in the Ditto Account Portal. Learn about signage lists and how to create them here.
Once you create a list, you can add signage items to that list and choose where to display it.
Get the most out of signage by adding your lists to a layout!
View our other step-by-step guides to get the most out of Ditto digital signage.
Your setup is complete!
Our job here is done. Your initial setup is complete. You can now mirror your device screens, display digital signage and send on-screen alerts with Ditto.
If you have questions, or if you experience trouble during setup, contact the Ditto support team for assistance. We’re happy to help.
Next Steps
Learn how to customize your Ditto experience by adding branding, messaging, colors, images, and more.